Lab 02
Creating an Azure Network
Overview
This assignment sets up a software-defined network for Azure.
Deliverables / What to Submit
-
Take a screenshot of the web page to submit for credit.
-
From the Azure Portal choose Home then VM2. Take a screenshot of the vm2 configuration. Include your username on the right side of the screen.
-
Examine the code to create the rule to allow HTTP traffic through webnsg in Part 2 step 10.
Getting Started
-
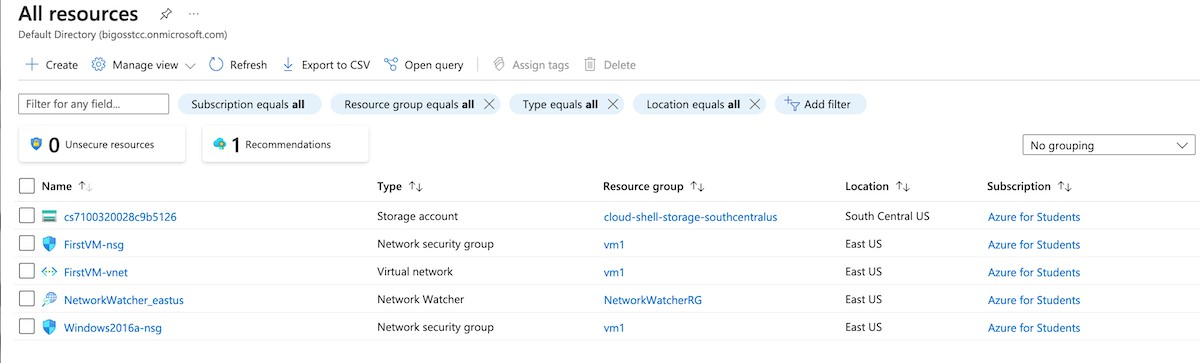
Login to https://portal.azure.com. From the Home screen choose All Resources.
-
Note the names of your existing resources. Your resources may look different from the image below.
-
Choose Export to CSV. Save the file for later use.
-
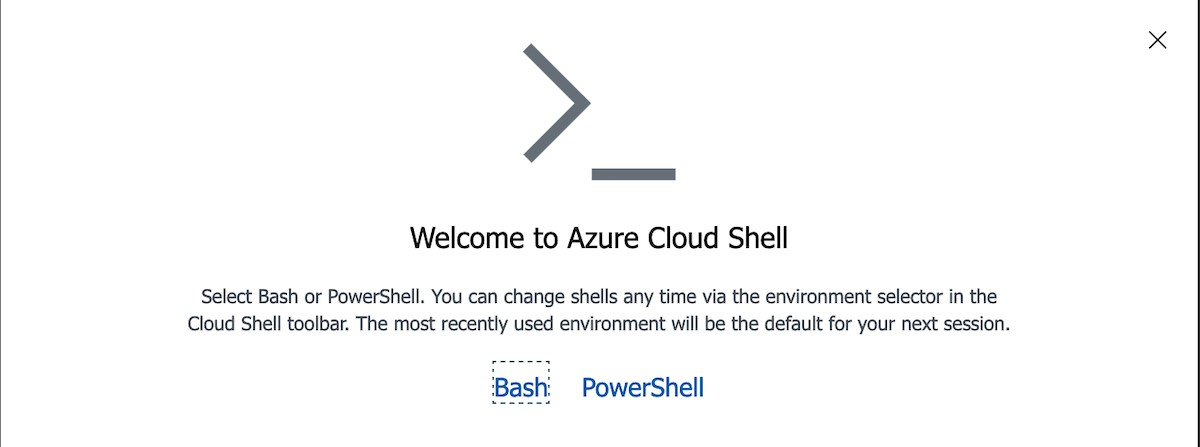
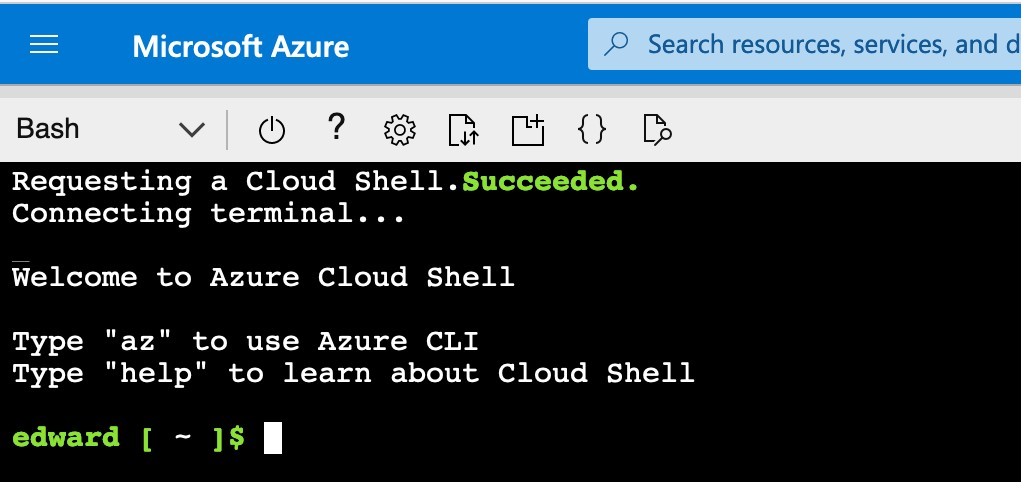
Create a new tab on the browser. Open https://shell.azure.com on this new tab. This step opens an Azure shell command line interface (CLI).

-
Select Bash Shell.
-
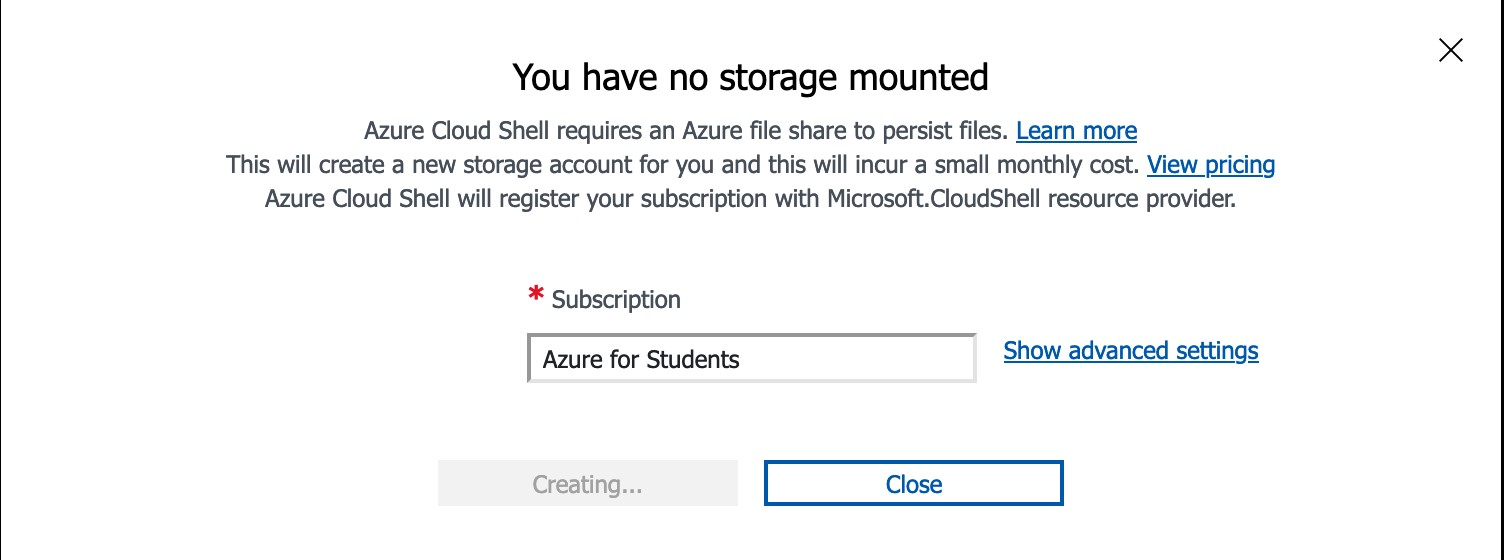
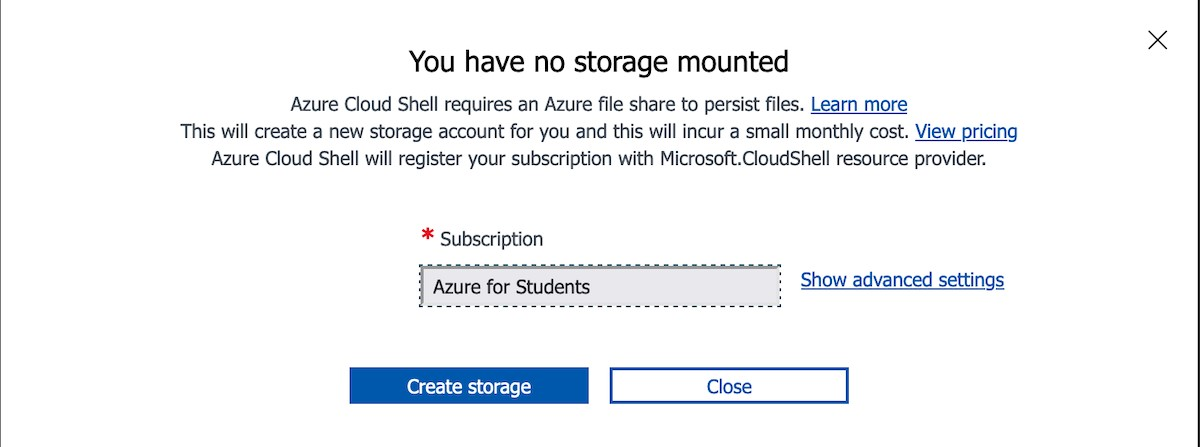
Choose Create Storage. This creates permanent storage for the CLI shell operations.

-
The storage may take several minutes to create. Wait until it is complete.
-
On completion, the Bash shell will appear.

-
Create SSH keys for the CLI using the ssh-keygen command.
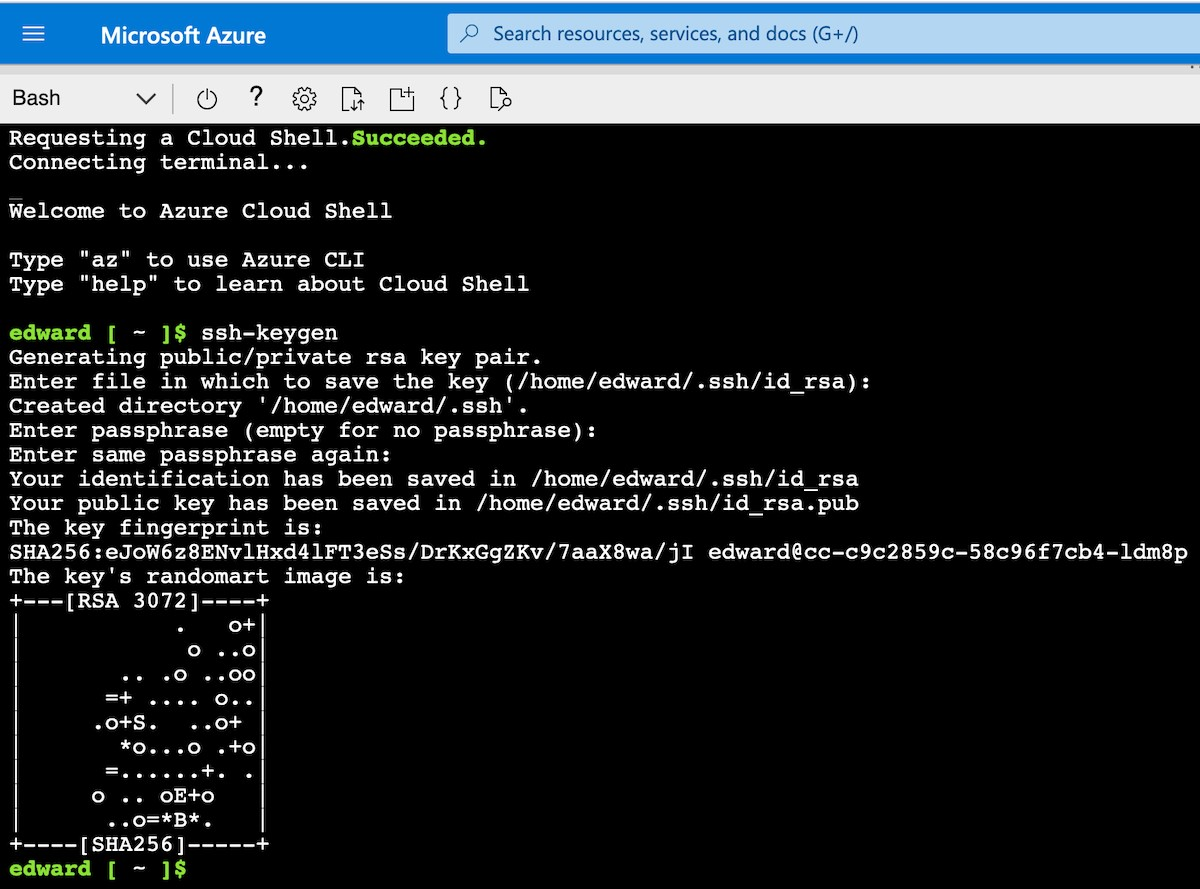
-
List the directory using ls -la. The keys are stored in the .ssh directory. Use ls -la .ssh to display the key files id_rsa and id_rsa.pub.
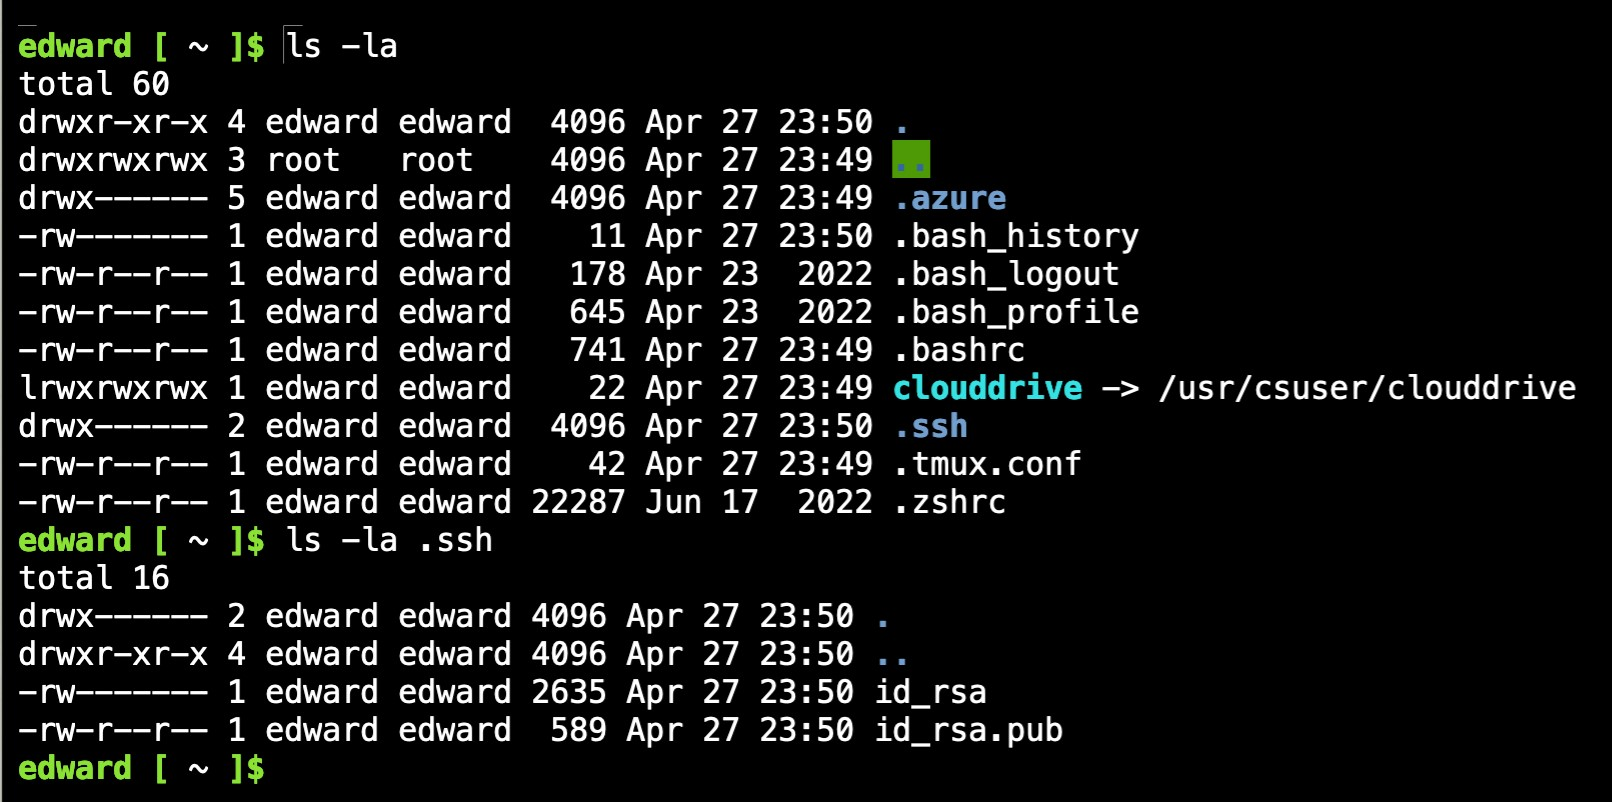


Use the cat commands to display the contents of the public key.
Creating a Software Defined Network (SDN)
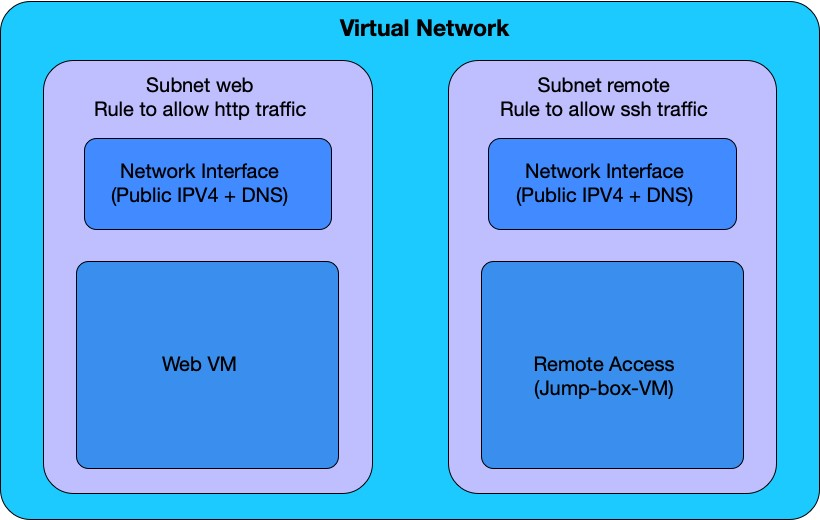
Azure uses a software-defined network (SDN) to provide network services to virtual machines (VMs). This set of steps will create an SDN for the next set of VMs. It helps to visualize the parts of the SDN.
-
The SDN is composed of virtual networks and subnets (including IP address pools). We will create two subnets.
-
Virtual network interface cards.
-
One or more public IP addresses.
-
Internal DNS name and optional public DNS names for external name resolution
-
Network security groups and rules are used to secure and control the flow of network traffic. This function works the same way a regular firewall controls the flow of packets.
Part 1 - Setting up the network
-
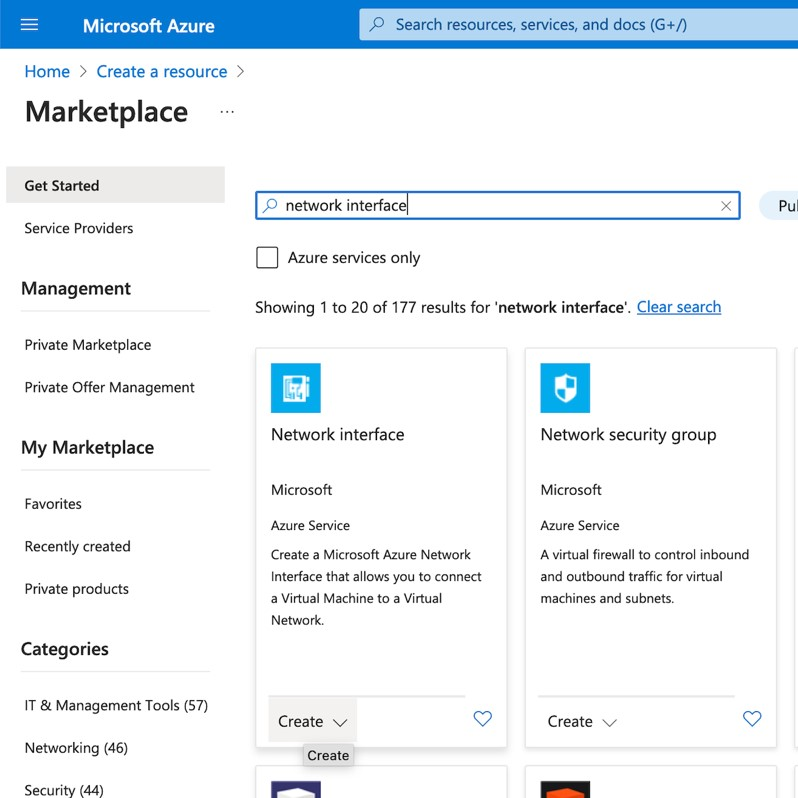
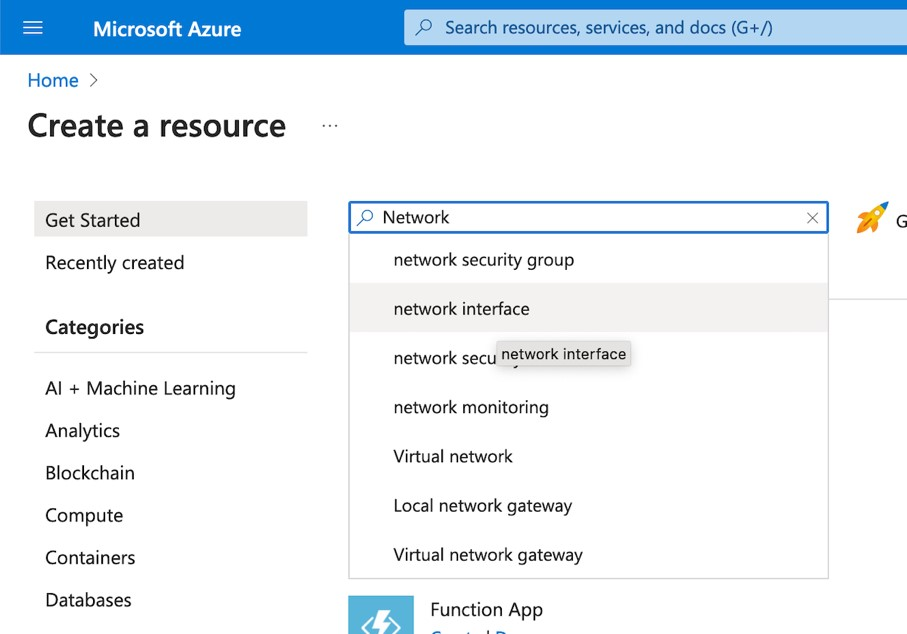
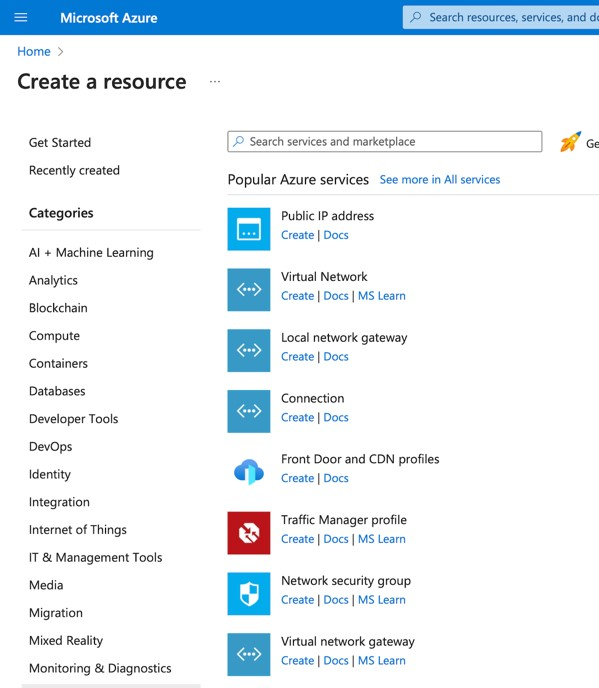
Create a Network Interface. Select the Home page on the Azure Portal. Choose Create resource. In the search box enter Network. Select Network interface.

-
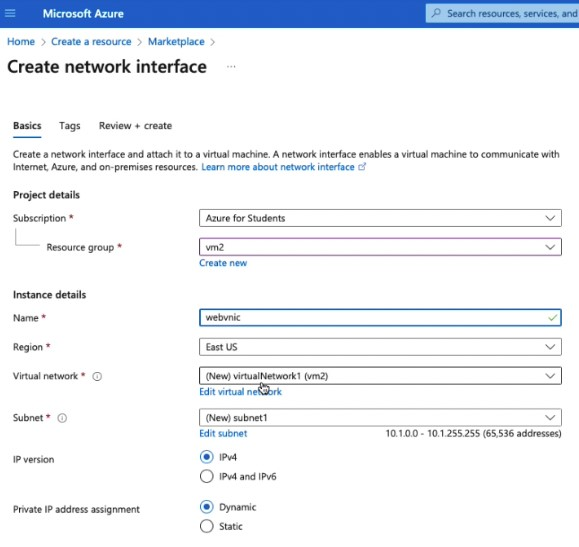
Select Network interface and then Create.
Resource group: vm2
Name: webvnic
Region: East US
Virtual network: virtualNetwork1
-
Examine the subnet addresses. The 10.1.1.0/16 class B is reduced to 10.1.1.0/24. Select Edit subnet.
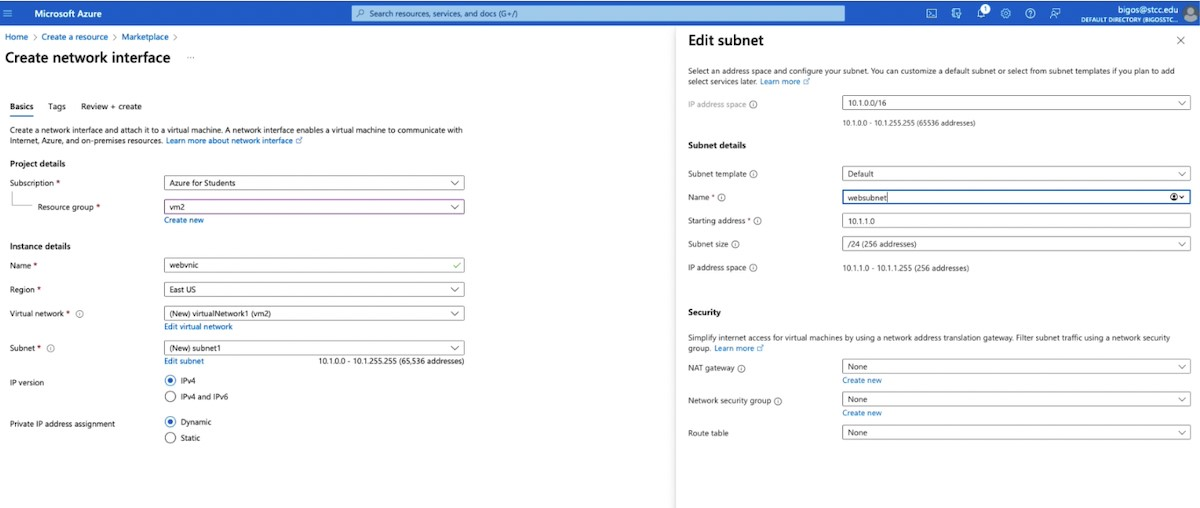
Select Edit subnet.
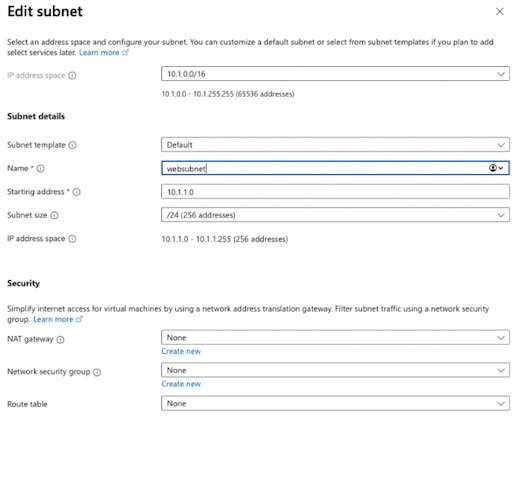
Use the following values.
Name: websubnet
Starting address: 10.1.1.0
Subnet size: /24 (256)
Save the subnet changes.
Select the Static IP radio button.
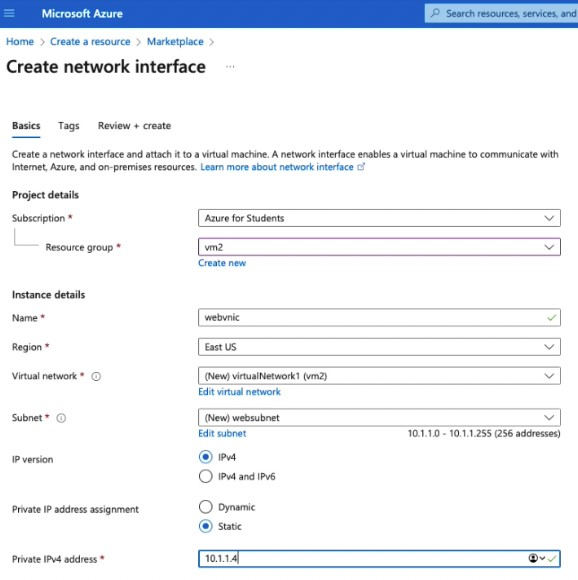
Private IP address assignment: static
Private IPv4 address: 10.1.1.4
Save the interface configuration. After validation choose Create.


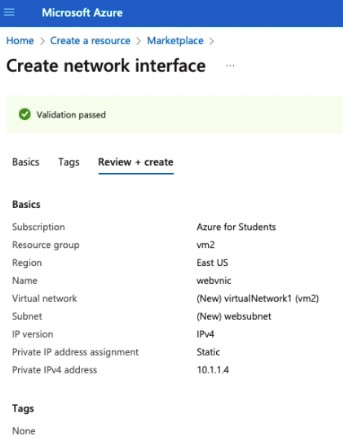
View the webvnic configuration.
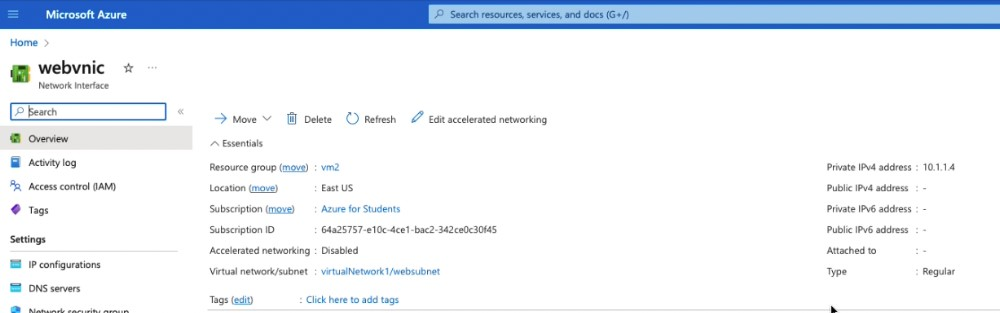
Notice there is no public IPv4 address listed on the interface.
From the Home screen choose Create, Network, Public IP address.
Enter the following values.
Resource group: vm2
Name: webPublicIP
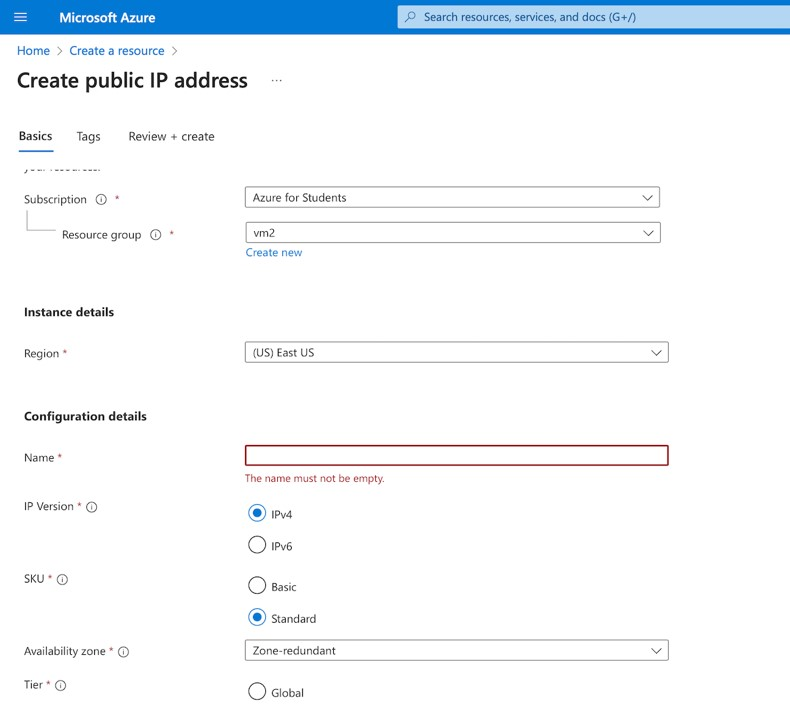
Save the public IP address. Validate and create the IP address.
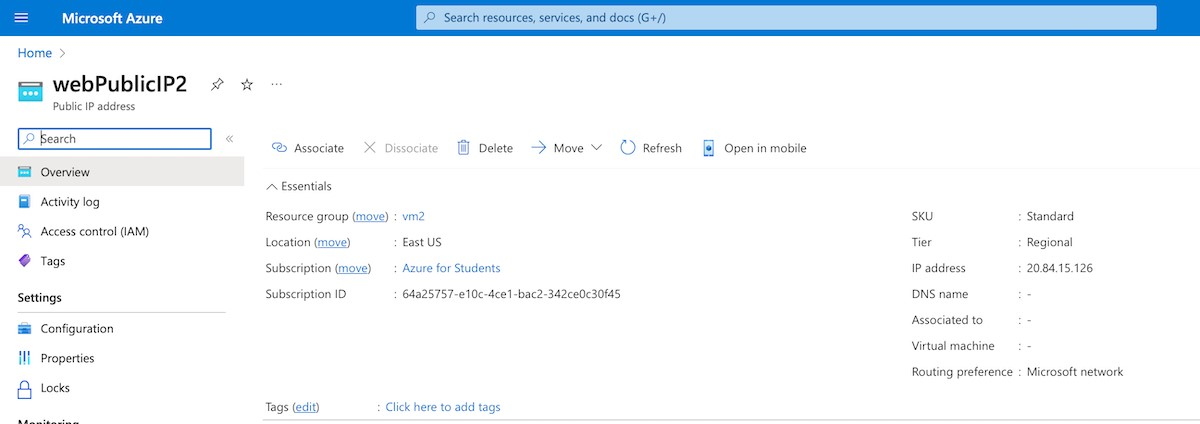
Associate the public IP address with the network interface. Note: the screens use the name webPublicIP2 but you will be using webPublicIP.
Examine the webPublicIP configuration.
Choose the Associate button.
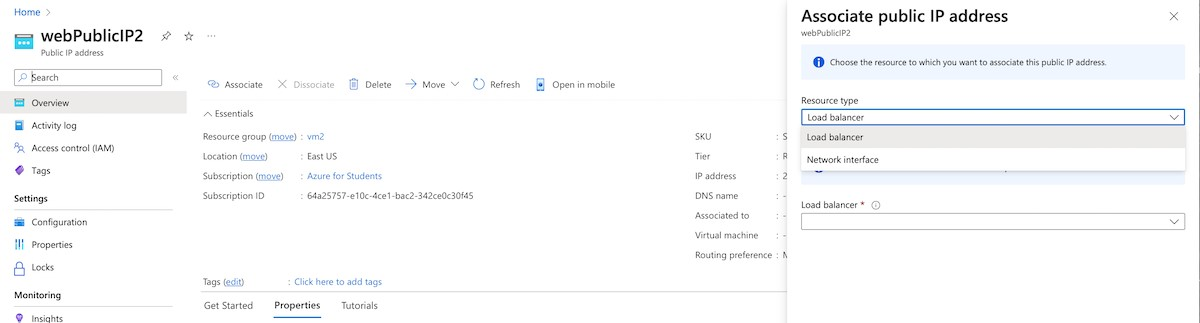
Select Interface from the Resource drop-down.

Choose the webvnic interface.
View the webvnic configuration. Note the public IP address.
Part 2 - Configuration with the CLI
Now that we have setup our first network manually, we will now add the rest of our networks and VM to the configuration. To speed up this process, we will use the Azure CLI to mass create networks and VM's for our networks.
Open a new tab on the browser to https://shell.azure.com
-
Create the remote security group remotensg.
az network nsg create --resource-group vm2 --name remotensg -
Create the remote network security group rules. Paste the code below into the Bash shell.
az network nsg rule create --resource-group vm2 --nsg-name remotensg --name allowssh --protocol tcp --priority 100 --destination-port-range 22 --access allow -
Create the remote subnet 10.1.2.0/24 with the subnet name remotesubnet and security group remotensg.
az network vnet subnet create --resource-group vm2 --vnet-name vnet-eastus-1 --name remotesubnet --address-prefix 10.1.2.0/24 --network-security-group remotensg -
Create the Ubuntu 22.04 Linux web server.
az vm create --resource-group vm2 --name webvm --nics webvnic --image Ubuntu2204 --size Standard_B1ms --admin-username azuremol --generate-ssh-keys -
Create the Ubuntu 22.04 Linux JumpBox server.
az vm create --resource-group vm2 --name remotevm --vnet-name vnet-eastus-1 --subnet remotesubnet --nsg remotensg --public-ip-address remotepublicip --image Ubuntu2204 --size Standard_B1ms --admin-username azuremol --generate-ssh-keys -
Test the connection to the jump box. Commands are in bold (use your IP address, the one below is an example).
edward [ ~ ]$ eval $(ssh-agent) Agent pid 301
edward [ ~ ]$ ssh-add
Identity added: /home/edward/.ssh/id_rsa (edward@cc-c9c2859c-
58c96f7cb4-ldm8p)
edward [ ~ ]$ ssh -A azuremol@74.235.35.186
The authenticity of host '74.235.35.186 (74.235.35.186)' can't be established.
ED25519 key fingerprint is
SHA256:+lbhwT+eEeB9LXHoOKwRJ3fav5OtSvaHXB1C6yeREzA.
This key is not known by any other names
Are you sure you want to continue connecting (yes/no/[fingerprint])? yes
Warning: Permanently added '74.235.35.186' (ED25519) to the list of known hosts.
Welcome to Ubuntu 22.04.2 LTS (GNU/Linux 5.15.0-1037-azure x86_64)
-
Documentation: https://help.ubuntu.com
-
Management: https://landscape.canonical.com
-
Support: https://ubuntu.com/advantage
System information as of Tue May 2 03:17:47 UTC 2023
System load: 0.0732421875 Processes: 101
Usage of /: 5.0% of 28.89GB Users logged in: 0
Memory usage: 13% IPv4 address for eth0: 10.1.2.4
Swap usage: 0%
Expanded Security Maintenance for Applications is not enabled.
0 updates can be applied immediately.
Enable ESM Apps to receive additional future security updates.
See https://ubuntu.com/esm or run: sudo pro status
The programs included with the Ubuntu system are free software; the exact distribution terms for each program are described in the individual files in /usr/share/doc/*/copyright.
Ubuntu comes with ABSOLUTELY NO WARRANTY, to the extent permitted by applicable law.
To run a command as administrator (user "root"), use "sudo <command>". See "man sudo_root" for details.
azuremol@remotevm:~$
-
-
Connect to the webvm server.
azuremol@remotevm:~$ ssh 10.1.1.4
The authenticity of host '10.1.1.4 (10.1.1.4)' can't be established.
ED25519 key fingerprint is
SHA256:1pFU2M0so/8idcudTOHBV0ZDnaQ4trDEwdIeBtTkUDI.
This key is not known by any other names
Are you sure you want to continue connecting (yes/no/[fingerprint])? yes
Warning: Permanently added '10.1.1.4' (ED25519) to the list of known hosts.
Welcome to Ubuntu 22.04.2 LTS (GNU/Linux 5.15.0-1037-azure x86_64)
-
Documentation: https://help.ubuntu.com
-
Management: https://landscape.canonical.com
-
Support: https://ubuntu.com/advantage
System information as of Tue May 2 03:19:18 UTC 2023
System load: 0.0 Processes: 95
Usage of /: 5.0% of 28.89GB Users logged in: 0
Memory usage: 13% IPv4 address for eth0: 10.1.1.4
Swap usage: 0%
Expanded Security Maintenance for Applications is not enabled.
0 updates can be applied immediately.
Enable ESM Apps to receive additional future security updates.
See https://ubuntu.com/esm or run: sudo pro status
The programs included with the Ubuntu system are free software; the exact distribution terms for each program are described in the individual files in /usr/share/doc/*/copyright.
Ubuntu comes with ABSOLUTELY NO WARRANTY, to the extent permitted by applicable law.
To run a command as administrator (user "root"), use "sudo <command>". See "man sudo_root" for details.
azuremol@webvm:~$ ls azuremol@webvm:~$ uname -a
Linux webvm 5.15.0-1037-azure #44-Ubuntu SMP Thu Apr 20 13:19:31 UTC
2023 x86_64 x86_64 x86_64 GNU/Linux azuremol@webvm:~$
-
-
Install the webserver on webvm.
sudo apt update && sudo apt install -y apache2Open port 80 for the web server. Log out from Linux server webvm. Log out from Linux server remotevm. Enter the commands from the Azure CLI shell.
-
Create the web network security group webnsg
az network nsg create --resource-group vm2 --name webnsg -
Create the webnsg rules for the HTTP port 80.
az network nsg rule create --resource-group vm2 --nsg-name webnsg --name allowhttp --protocol tcp --priority 100 --destination-port-range 80 --access allow -
Associate the webnsg rule with the webvnic.
az network nic update --name webvnic --resource-group vm2 --network-security-group webnsg -
Test the web server by opening a connection to your public IP address. The syntax is http://publicipaddress, where publicipaddress is your server's public Ip address which can be found on your VM's information tab. In my case, it would be http://20.81.63.106.
Be sure to use http and not https!
STOP. Take a screen snapshot of this screen for the lab submission.
Refer to deliverables 2 & 3 at the top of the lab for the other two lab requirements.